In this blog post i will cover how to configure DHCP scopes in PFSense.
In the previous article i covered the configuration of VLAN Interfaces and setup you can review that article here or the link at the bottom of this post.
Once you have logged in the PFSense web interface
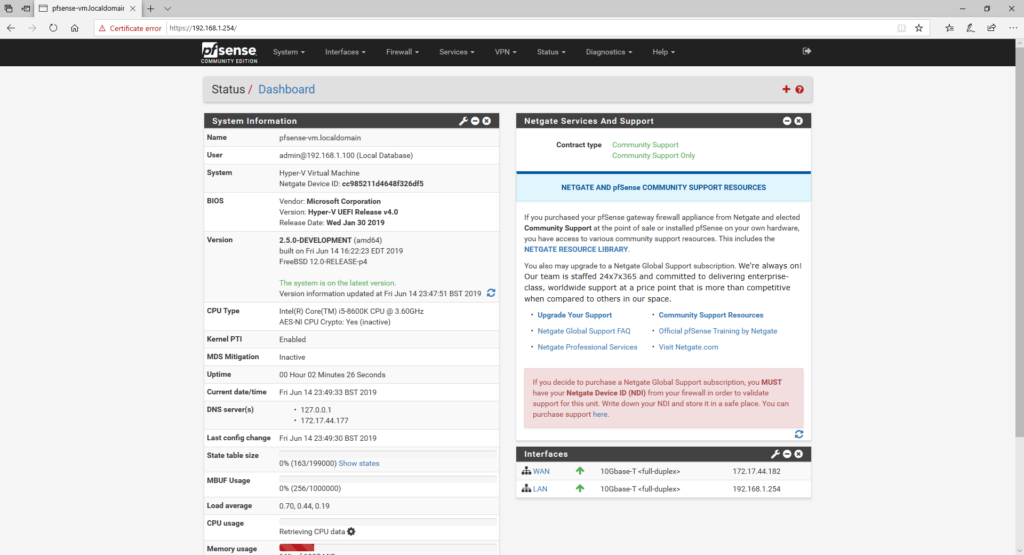
From the dashboard we want to navigate to “Services” -> “DHCP Server” .

From the DHCP Server Page we can configure the VLAN Scopes.

Select the VLAN Interface created for example: VLAN10 when you first get to the VLAN DHCP Options this is how it will look:
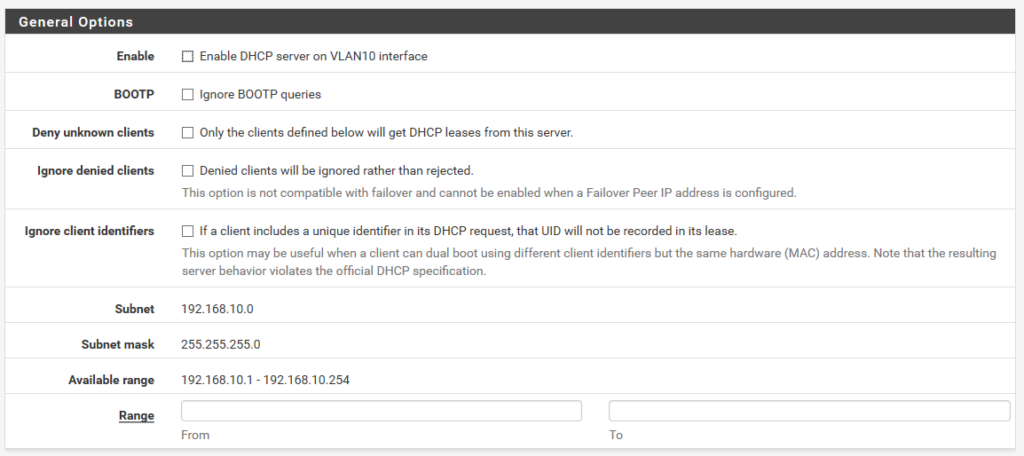
To configure the DHCP Service we need to Enable the Server on the VLAN Interface and then define the usable DHCP Scope

You can repeat these steps to configure VLAN20 and VLAN30, now we have the DHCP Scopes configured we need to configure the Hyper-V Virtual Switch to act as a trunk port to allow the DHCP Packet requested to the LAN Interface of the PFSense Virtual Machine.
# Import PowerShell Module
Import-Module Hyper-V

# Configure Virtual Firewall Interface
$vFirewall = 'pfsense-vm'
Get-VM $vFirewall | Get-VMNetworkAdapterVlan
$vAdapter = Get-VM $vFirewall | Get-VMNetworkAdapter | Where-Object -Property SwitchName -eq vSwitch_PFSenseLAN
$vAdapter | Set-VMNetworkAdapterVlan -Trunk -AllowedVlanIdList '0,10,20,30' -NativeVlanId '0'
Get-VM $vFirewall | Get-VMNetworkAdapterVlan

To Test the DHCP Services, we can configure a network adapter on Windows Host Machine. Firstly we know that the current PFSenseLAN Adapter has no VLAN Configuration on, because the DHCP IP Address is: 192.168.1.x as this is the default LAN DHCP Scope.

From the Hyper-V Manager window, under the Actions Tab we need to select “Virtual Switch Manager” and configure the VLAN ID as shown below.

then click Apply and complete: ipconfig /release & ipconfig /renew

PFSense Mini Series:
[x] Installing PFSense 2.5 BETA on Hyper-V Gen2 Virtual Machine
[x] Configuring PFSense VLAN Interfaces
[x] Configuring PFSense DHCP Scope and Virtual Switches
[x] Configuring PFSense VLAN and External Windows DHCP

